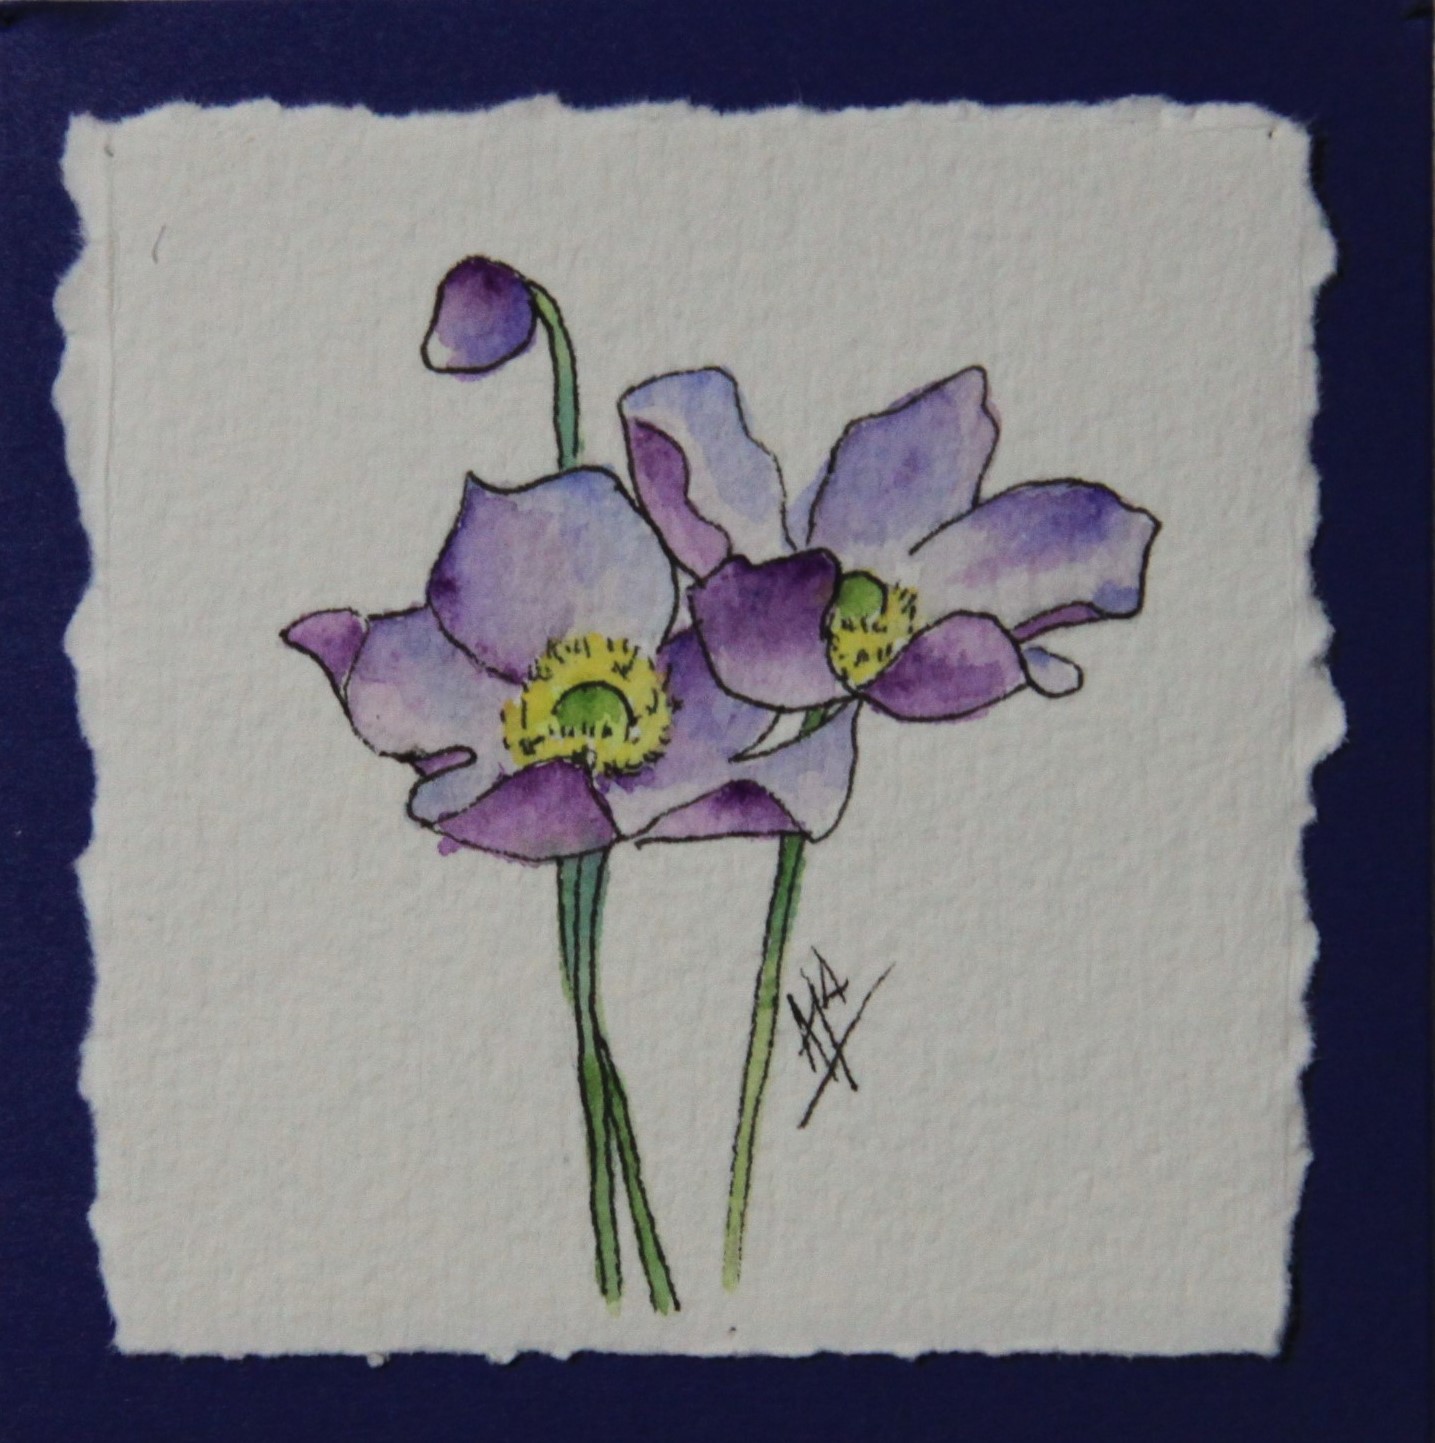
As the seasons change so do my watercolour cards. I try to paint my cards from life and so the subject matter, colour and feel of the cards change. These cards give me a great reflection of the year in nature. Here are a few of the latest cards.
This blog serves to give you a glimpse into my creative ventures and what inspires them. Much of my art is directed by my faith and the awe I feel observing the natural world.
Search This Blog
Thursday, 18 October 2018
Thursday, 11 October 2018
More Progress on the Art Quilt
I admit, I have been procrastinating. Sometimes when I hit an impasse, I procrastinate. I wasn't sure if the mist was working on my canoe art quilt so I just let it sit on my design wall for a couple of weeks. This morning I decided, I had to move forward on it so that was my goal for today.
I did receive some feedback on my query from last week's blog and based on that, I decided to add one more layer of organza to the mist section and then be done with it. I may still be able to enhance that area with quilting when I get to that stage.
After I added the organza, I trimmed the quilt top to straighten the edges.
I thought you might also like to see what the back of the quilt top looks like. It is a mess of seams and thread but from a distance, it looks pretty cool too, I think.
I then sewed 4 inch strips of black cotton all around the edges of the quilt. This is not meant to be the border. I plan to have this quilt stretched and framed like a painting and so these black strips will help to stretch the quilt onto stretcher bars. Once it is stretched, you won't see the black. The quilt image will go right to the edge of the stretcher.
I did receive some feedback on my query from last week's blog and based on that, I decided to add one more layer of organza to the mist section and then be done with it. I may still be able to enhance that area with quilting when I get to that stage.
After I added the organza, I trimmed the quilt top to straighten the edges.
I thought you might also like to see what the back of the quilt top looks like. It is a mess of seams and thread but from a distance, it looks pretty cool too, I think.
| This is a close up of the upper left of the back. |
I then sewed 4 inch strips of black cotton all around the edges of the quilt. This is not meant to be the border. I plan to have this quilt stretched and framed like a painting and so these black strips will help to stretch the quilt onto stretcher bars. Once it is stretched, you won't see the black. The quilt image will go right to the edge of the stretcher.
I am now placing the batting and the back fabric on the quilt top and then quilting can begin.
Friday, 5 October 2018
Finding Inspiration and Needing Assistance with Canoe Quilt
Yes, I am a day late with my blog. This week has been really busy and my art day was taken up with activities that were not all art related but necessary and enjoyable. One of those activities was a short hike in a nearby Conservation Area. When the weather is nice, I've learned, we have to take advantage of it. All the more because winter is on it's way and we tend to spend less time out of doors when its cold and snowy.
Since I hadn't done much art yesterday, I decided to take my camera along and shoot some inspiration shots of fall colours beginning and the transition of plants to their winter looks.
I also have been procrastinating on my art quilt because I'm struggling with the mist. Below are two photos of the quilt. The first has several layers of organza in the area of the mist and the second has one layer of organza and one layer of some lace I found in my stash. I'm wondering is less is more or if more is more. Could you let me know which one looks the most like mist rising from the water? Or if it doesn't at all let me know that too and I'll go back to the drawing board.
Happy Canadian Thanksgiving, everyone!
Since I hadn't done much art yesterday, I decided to take my camera along and shoot some inspiration shots of fall colours beginning and the transition of plants to their winter looks.
I also have been procrastinating on my art quilt because I'm struggling with the mist. Below are two photos of the quilt. The first has several layers of organza in the area of the mist and the second has one layer of organza and one layer of some lace I found in my stash. I'm wondering is less is more or if more is more. Could you let me know which one looks the most like mist rising from the water? Or if it doesn't at all let me know that too and I'll go back to the drawing board.
Happy Canadian Thanksgiving, everyone!
Thursday, 27 September 2018
Canoe Art Quilt and Using my New Machine
The Canoe Art Quilt top is pieced together! My Office Time App tells me I've worked 71 hours on it so far.
The light green and light blue section across the quilt are where the organza will be placed to create the mist rising from the water. Today, I placed several layers of organza on the quilt top to see how it would look and noticed that the section of land in the middle of the composition is supposed to look like it is far in the distance and it wasn't reading that way. In order to fix that I also placed a larger piece of organza (just one layer) over top of that section and it does a nice job of pushing it back into the distance and making the two land forms on either side of the quilt come forward into the middle ground.
In the photo above, I have one layer of organza over the mist area of the water. In the next photo there are about 6 layers of organza laid in that area.
I haven't sewn the organza down yet because I am not sure it reads as mist yet. Maybe you could let me know what you think.
Over the summer I had the opportunity to buy a sit-down quilting machine at a discounted price because it was a demo and was a bit damaged. I had to wait a long time for all the parts to be sent to me and I also had to spend some time putting it together and figuring out how it worked. It is a Janome Artistic Quilter and it has a large table and a larger space under the machine than my domestic sewing machine which will make quilting much easier and quicker.
I did some practicing on scrap fabric and adjusted the stitch tensions before I used it to sew down some of the organza on my quilt top. I still have a lot to learn about this machine but I'm sure it will make my job a little easier.
| Finished quilt top with very rough edges. |
In the photo above, I have one layer of organza over the mist area of the water. In the next photo there are about 6 layers of organza laid in that area.
I haven't sewn the organza down yet because I am not sure it reads as mist yet. Maybe you could let me know what you think.
Over the summer I had the opportunity to buy a sit-down quilting machine at a discounted price because it was a demo and was a bit damaged. I had to wait a long time for all the parts to be sent to me and I also had to spend some time putting it together and figuring out how it worked. It is a Janome Artistic Quilter and it has a large table and a larger space under the machine than my domestic sewing machine which will make quilting much easier and quicker.
I did some practicing on scrap fabric and adjusted the stitch tensions before I used it to sew down some of the organza on my quilt top. I still have a lot to learn about this machine but I'm sure it will make my job a little easier.
Thursday, 20 September 2018
Eco-Dying Experiment
This week I took some time to experiment with eco-dying. This is dying with natural substances like plants and bugs. I didn't use bugs but I did gather some plants from my garden to use.
I took out some of my white cotton fabric and first boiled it in vinegar and water for an hour to make the fabric ready to take the plant dyes and make them fairly colour fast so they wouldn't wash out of the fabric.
Apparently silk takes the dyes better than cotton but this time I just used the cotton.
I laid out the fabric on my deck and placed the plants on top of it.
This one has goldenrod, chestnut leaves and mountain ash leaves and some pink mandevilla blossoms on it.
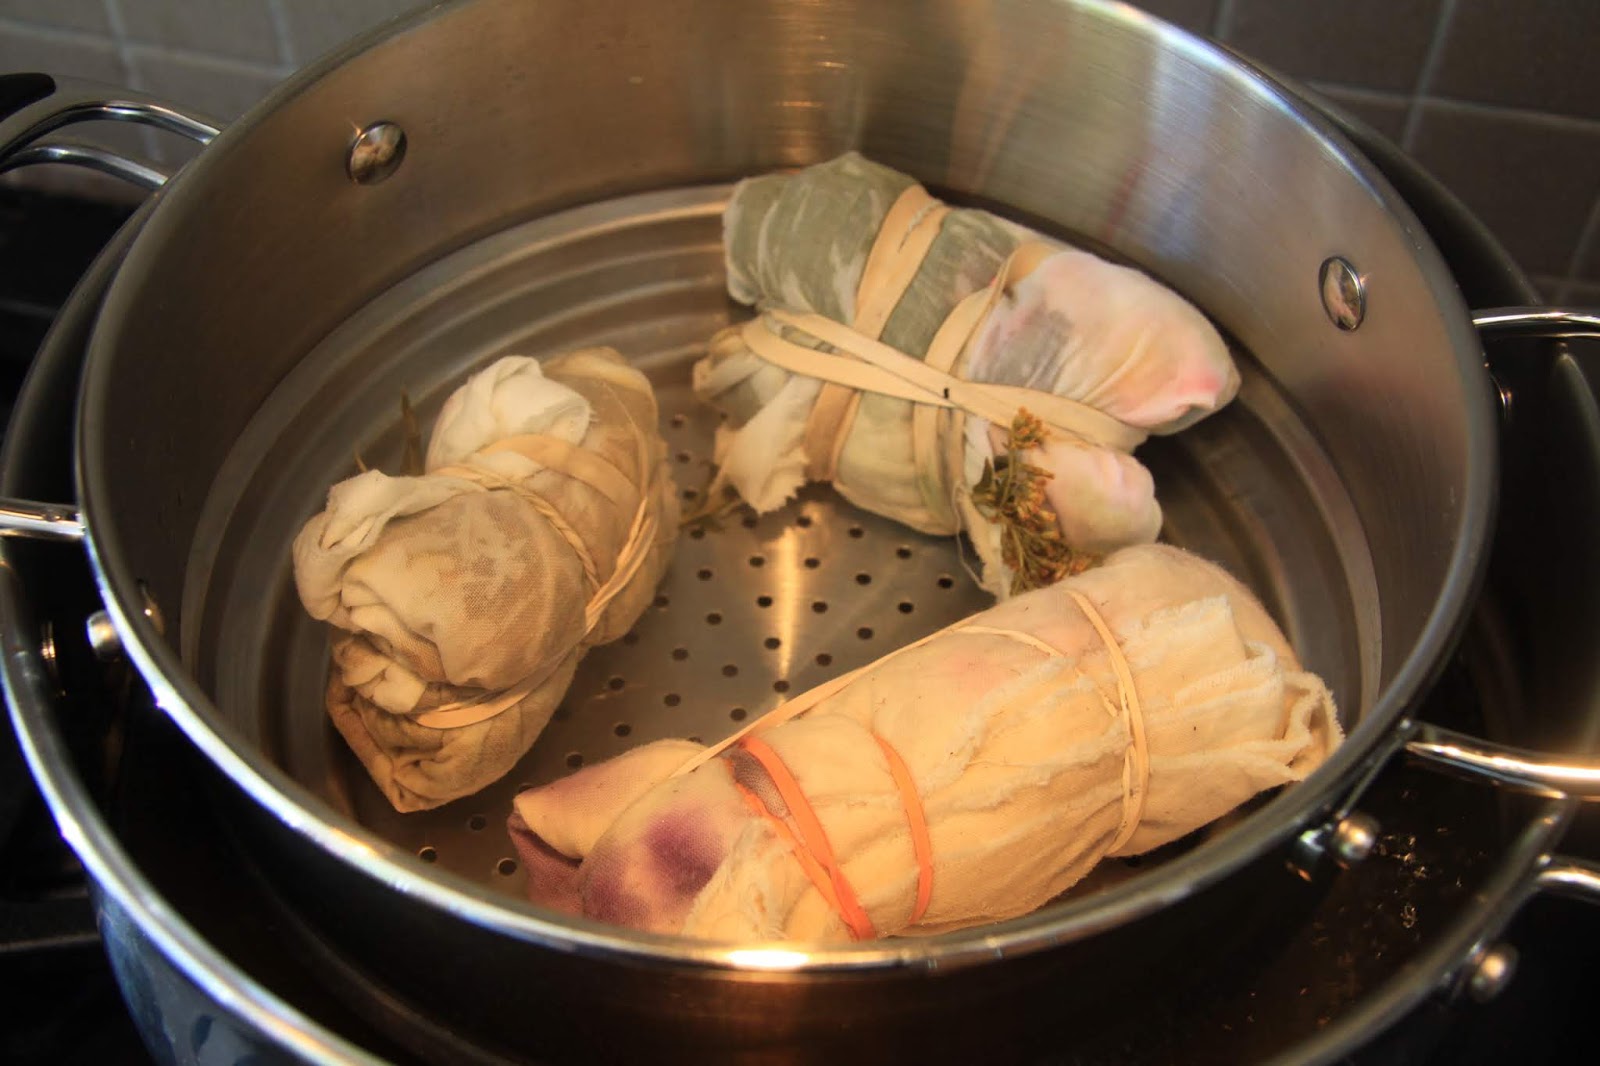
I then rolled and bundled the fabric with the plants inside into small tight packages and kept them together with elastics. Then they were placed in a colander above a pot of water in order to steam them for 1 hour.
After the hour I placed each bundle in a ziploc bag and put them outside in the sun and left them out there all night to continue steeping.
In the morning I unwrapped the bundles.
The dying is very subtle as you can see but the different plants gave me different results. The bundle with the chestnut, mountain ash, golden rod and mandeville was a very light result.
Bundle#2 had goldenrod, mountain ash leaves, petunia blossoms, verbena blossoms and geranium blossoms. This one turned out the best with some nice pinks and purples in it.
I took out some of my white cotton fabric and first boiled it in vinegar and water for an hour to make the fabric ready to take the plant dyes and make them fairly colour fast so they wouldn't wash out of the fabric.
Apparently silk takes the dyes better than cotton but this time I just used the cotton.
I laid out the fabric on my deck and placed the plants on top of it.
This one has goldenrod, chestnut leaves and mountain ash leaves and some pink mandevilla blossoms on it.
I then rolled and bundled the fabric with the plants inside into small tight packages and kept them together with elastics. Then they were placed in a colander above a pot of water in order to steam them for 1 hour.
After the hour I placed each bundle in a ziploc bag and put them outside in the sun and left them out there all night to continue steeping.
In the morning I unwrapped the bundles.
The dying is very subtle as you can see but the different plants gave me different results. The bundle with the chestnut, mountain ash, golden rod and mandeville was a very light result.
Bundle#2 had goldenrod, mountain ash leaves, petunia blossoms, verbena blossoms and geranium blossoms. This one turned out the best with some nice pinks and purples in it.
You can see the pattern of the mountain ash leaves in the section above.
The third bundle was just brown leaves that had already fallen from some of the trees in the yard. These also gave more colour than in the first bundle.
I was hoping I would get some distinct leaf prints and blossom prints but I am happy I got some colour on the fabric. I will have to do some more experimenting and perhaps studying on this technique.
I am not certain what I'll use these little samples for but I am sure something will come to me.
Thursday, 13 September 2018
It's Getting Close!
I have been steadily working on my art quilt and it's getting close to a completed top. The piecing is almost done. I placed a small amount of organza on top of a small area that I want to have the mist coming up on just to see if it will work and I think it will.
At the Fibre Content Show that is also exhibiting one of my art quilts, I saw several pieces which used silk organza and I really liked the look. I took special note of how these artists used the organza and how they applied it. The organza is transparent so the background is still visible behind one layer of it. If you want to see less background you just place a couple of layers over each other. The organza also gives the piece a bit of a shimmer which might be a plus on my quilt.
Thursday, 6 September 2018
Watercolour Flowers
Each art day I go out into my garden and do a few watercolour paintings of the flowers in my garden. These little paintings become cards that I send to various people. Here are a few of the recent creations.
Subscribe to:
Posts (Atom)