Search This Blog

Thursday 31 December 2015

Easy Child's Art Apron Tutorial

I have 6 grandchildren and the three oldest often join me in the studio. They love to cut, glue and paint. They love to get right into the art making which means they sometimes get messy. For Christmas this year I made them their own Art Aprons that they could wear over their clothes when they are being creative.

The process is quite easy so I thought I'd share it here with you. These aprons can also be used in the kitchen with children who love to bake or cook. Just change the theme from Art to Kitchen.

I bought some raw canvas fabric and cut it into three pieces measuring 15" X 30". Then, using fabric paint, I had the kids print it with their feet and hands. This is best done outside where the paint can be washed away with water if it gets on areas other than the canvas. Once the paint was dry, I heat set it with an iron.


Using a pattern I drew on tracing paper, I cut out the shape of the apron from the printed canvas.
The length of the apron is 22 inches. The width is 15 inches and the armhole is cut out of the top section at 3.5 inches from each side and tapered out to the edge of the apron at 8 inches from the top.


From the left over  8" X 15" piece of canvas, I made a pocket for the front of the apron. I folded the raw edges all around the pocket under 1/4" and pressed them. I then sewed the top pocket edge to finish it nicely. Then I pinned the pocket to the front of the apron and sewed it along the two sides and the bottom, leaving the top open. I used some coordinating fabric to iron on each child's name using Heat n Bond.

I bought a package of double fold extra wide Bias Tape and 2 metres of  matching ribbon in fun colours for each child. The bias tape is sewn all around the raw edges of the apron. Using the matching ribbon, I cut 65 cm for the neck band and sewed it to the top edges of the apron bib. Then using the rest of the ribbon, I sewed it across the front of the apron just under the armholes and above the pocket. This is the waistband and tie. The neck band may need to be shortened with a knot or a few stitches if it is too big for a small child.


Acceptance!!

This is just an early, quick blog post to get the news out! I've been ACCEPTED into the SAQA show called "My Corner of the World" Canada!! I'm so honoured and excited! Out of 115 entries, 40 were chosen.

I will now have to fill out the necessary paperwork and write a Bio and send it off and then prepare my quilt for shipping to Stratford, Ontario where the show will be set up in the Stratford-Perth Museum. From there it will likely tour to different venues until December 2018.

Thursday 24 December 2015

Canoe Trip Reminiscing

Today is Christmas Eve and you'd think I'd be frantically trying to finish Christmas shopping or making gifts for Christmas but I'm done! So instead I could finish off some projects that have been sitting on the back burner.

Outside the sun is shining and the temperature is about 14C! Not Christmas weather at all. In fact, my husband and I are going to golf this afternoon! Unthinkable! This balmy weather has made me reminisce about our Women's Canoe Trip from the past Summer and I finally finished the little postcard mementos that I make for all the participants. I've posted them below so have a look and be transported back to Summer for a few minutes.

I wish everyone a Wonderful Christmas and a Blessed New Year!

French River Eastern Outlet


Whale's Mouth, French River


Campsite at the Elbow, French River


The Elbow, French River


Dalles Rapids, French River


Manoeuvreing up the Dalles Rapids, French River


Wanapitei Bay, French River


Hartley Bay Campsite, French River


Sunset at Hartley Bay, French River


Sunrise at Hartley Bay, French River


Thursday 17 December 2015

What is Christmas?

These last few weeks, I have been concentrating on getting Christmas gifts crafted, which is why I didn't blog last week. Can't reveal what I've been doing. But today I resumed my neighbourhood walk and got a little more fodder for the sketchbook. As we draw closer to Christmas, there are many more decorations going up in the neighbourhood. You see red bows everywhere, some trees are bedecked with Christmas balls, every door has a wreath and lots of people have evergreen boughs in pots at their front door. During the day you don't notice the lights that have been put out but many homes are ornamented with them and as soon as it gets dark the neighbourhood glows with all kinds of colours. Many people also have those blow up snowmen, christmas trees, santas on their lawns too but this morning when I walked past them, most were deflated and lying in a heap on the front lawn.

But something was certainly missing from all these festive decorations and I realized it when I saw a sign on someone's lawn that said, "Keep Christ in Christmas!" In most of these homes, Christ is nowhere to be seen. To me, Christmas is so very superficial if Christ is not the center of it. It is why so many people get very blue in January because their Christmas is a temporary high and lets them down every time. It is Jesus Christ we should be celebrating and meditating on during this season. That gives us lasting joy. Years ago, I had an idea to do two paintings on board that I could hang outside during the Christmas season. The idea was to get people to think about what they meant. I never did paint them but I did research and plan them. One painting was of a beautiful Christmas wreath and the other was the wreath without needles or decoration but instead it looked like a crown of thorns. The caption was "Accept the Gift". I didn't paint them perhaps because I was afraid of what people would think. I guess that is exactly why I should paint them. Perhaps, I will get the plans out again and get them ready for next Christmas.


The weather was unseasonably warm today so it was a good day to put together my Christmas pot at the front door. Once again I used a lot of my dried and dead plants from the garden to spruce it up.


This is last week's drawing with paint on it. Everything is truly ready for winter but the snow just isn't coming to Toronto.


These are some of the Christmas decorations I observed on my walks. I leafed through the whole sketchbook so far and it is a wonderful progression through the seasons. I hope we get some snow so I can include that as well.

Thursday 3 December 2015

Note from the Curator of "My Corner of the World" - Canada

Today I got an email from Bethany Garner who is the Curator of the Art Quilt Show that I entered my quilt into. It is a bulk email sent to all the entrants which thanks us for submitting our work. She writes:"The entries received for consideration are stunning and a hugely wide representation of the talent, varied techniques and unique and beautifully orchestrated style you each brought into your work for this exhibition."

They received 116 pieces from 73 artists in Canada. I believe the Juror has to choose only 40 pieces for the show. We will be notified later this month if we have been selected. It's exciting!

In the meantime, I have been working on a more traditional quilt with my sister, Ellen and my friend, Nynke and we have got the quilt top completed. We used batik fabric for this one. Batik is fabric that is died using wax resists and has a unique pattern and design. I really like batik fabrics.

This quilt is meant to be hung on a wall so I will be putting a sleeve on the back of it so a rod can be placed through it.


I also went on my weekly neighbourhood walk again this morning and got some sketches down in my sketchbook.

This is a sketch from last week but now it has colour.


This sketch was done to show that winter is near and the trees are now bare. I will put paint to this one too. I also sketched some of the Christmas decorations that various homes are adorned with. I hope to sketch a few more and paint them so when that page is done I'll post it too.

Thursday 26 November 2015

Noting the Seasonal Changes

Today, I went on another neighbourhood walk. It is really neat to look through my sketchbook and see the seasonal changes. I started the sketchbook this Spring just as the trees were budding and today I sketched bare branches with next year's buds beginning. The crab apples are still clinging to those branches, plants with pods are splitting open to let out their seeds and burrs are ripe in the ravine just waiting for man or animal to brush up against them in order to spread their seeds.

I also sketched the garbage truck, because today was garbage day. I put the garbage men into stress, so much so that they asked me if I had a problem I needed to talk to them about. They thought I was observing some misbehaviour and was planning on reporting them. I had to explain that I was an artist and I was just sketching my observations on my local walks. They were visibly relieved when I held up my sketchbook and wished me a good day.

I didn't carry any money with me which I realized as I was approaching Tim Hortons. Too bad. So I just sketched it. Now I have the iconic coffee place in my sketchbook for posterity.


Thursday 19 November 2015

"My Corner of the World" Show Entered

Well, yesterday I finished the quilting on my Rock Reflections quilt and so I took the necessary photographs of it. They wanted one full photo and one detail photo. There are special instructions for the photography as far as number of pixels, no distortion, proper colours, all edges of the quilt have to be visible and they have to be clear. It makes sense that they have all these rules and they do recommend having the quilt professionally photographed. I have always taken my own photographs and the fact that I have been accepted into shows and that they have also been used in a book tells me my photos will pass muster. I did take a few shots and chose the ones that best pictured my quilt. The jurors go only by the photos we send to evaluate whether the quilts are good enough for the show so they have to be up to snuff. However, there is still a chance that you are rejected when the quilt is actually sent because of something that didn't show on the photos.

Also thank you to those who replied to my request in the last blog. I found that 75 words is incredibly short and it was hard to say everything I wanted to say in so few words.

I will hear by the end of December whether I have been accepted into the show. In the meantime, I have to sew a hanging sleeve to the back of the quilt so it can be hung for display. That's what I am busy with now.

Now that the quilt is done, I can move on to the many things that I have put on back burners due to lack of time. I have a few Christmas projects in the wings and a few portraits to complete again. Plus, when I am working on something, I always get more ideas running through my head of things I'd like to do. There is no lack of inspiration just lack of time occasionally.

I am continuing my journal of drawings from the neighbourhood when I can. Below is the latest sketch.


Thursday 12 November 2015

Help Needed with Artist Statement

When I send in my application to enter my quilt into the "My Corner of the World" Quilt show, I have to include an Artist Statement of 75 words or less. An Artist Statement is a basic introduction to my art to help people appreciate it.

Basically it will tell people, why I make my art, what inspires me to make art, what my art signifies or represents, what is unique and special about my art and what it means to me.

I'm pretty sure I can write something about why I make art, what inspires me, and what it means to me. But its a little harder to write about what makes it unique or special. I have some ideas but I thought I would ask you, my loyal followers what you think is unique or special about my art, specifically my art quilts. Perhaps you could tell me how you feel when you view it or what questions come to mind. To help you with that just click into my gallery on this blog of my art quilts to view them.

Thanks so much for your help with this!


Thursday 5 November 2015

Quilting the Landscape Quilt


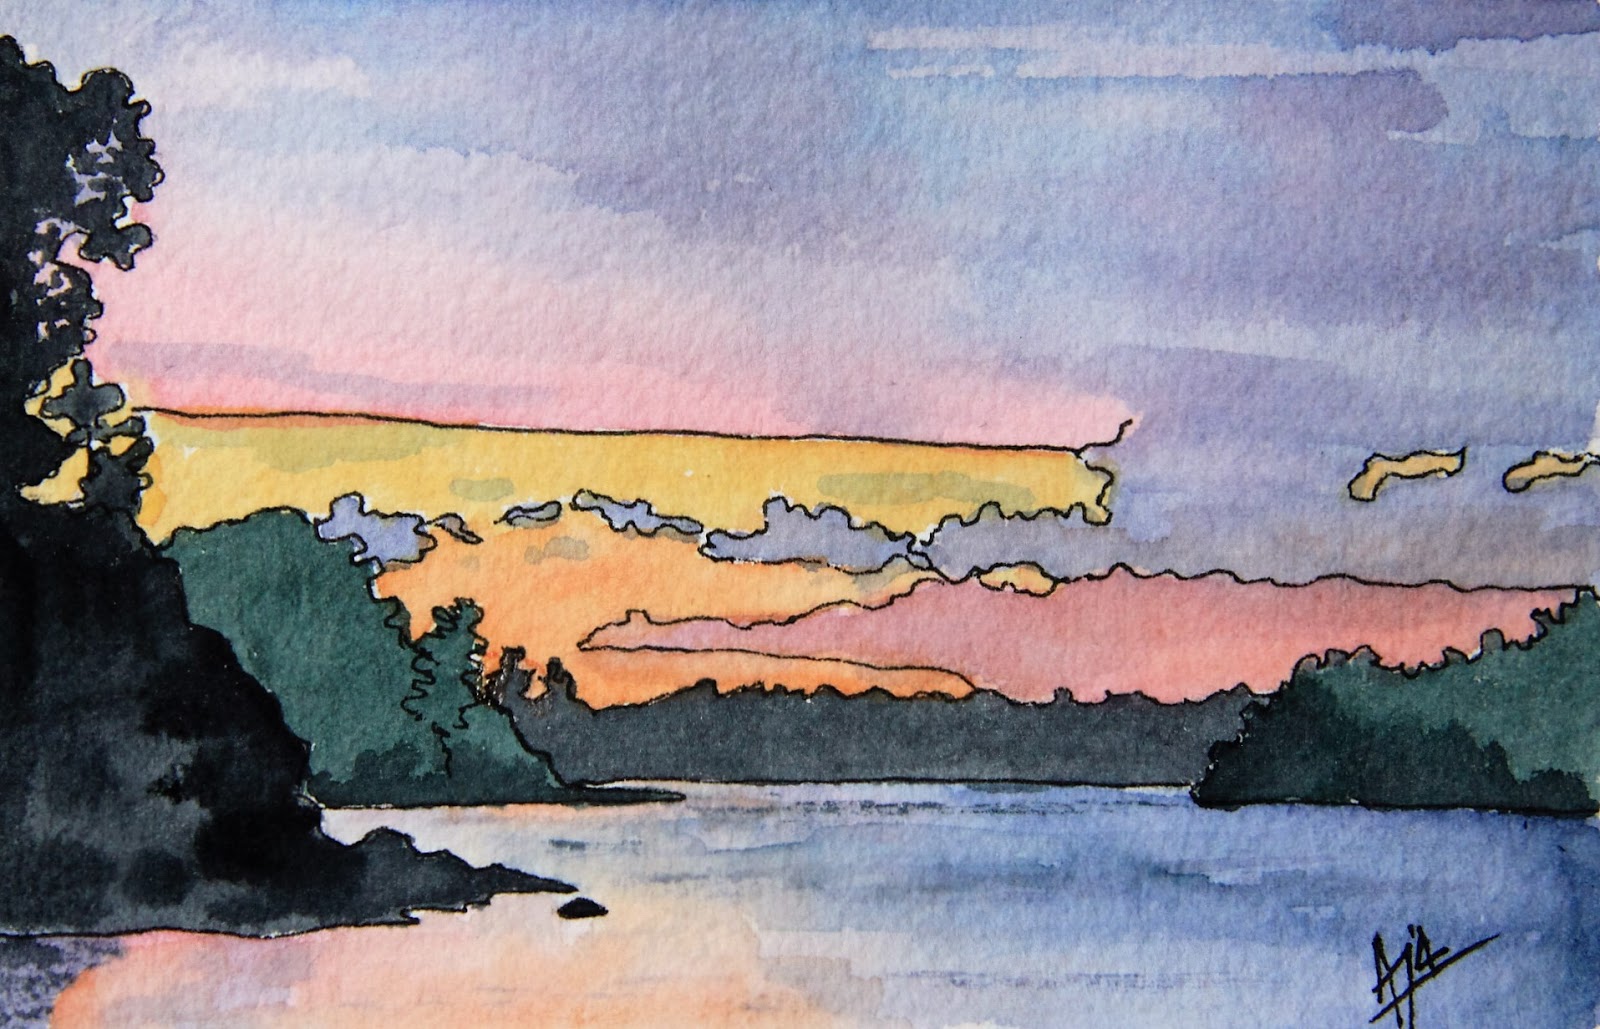
My inspiration for the quilt to remind you what it looks like


I put my quilt sandwich together this past week. That means I have added quilt batting and a backing fabric to my quilt top and am now ready to quilt it.

You might be asking why do we quilt the landscape or art quilt? Well, quilting was necessary to keep all the layers together when quilts were used as blankets on beds. The blankets were layered to give them warmth. Traditionally quilts were hand quilted. Some quilting was as easy as just pulling yarn through all the layers and then knotting it on each side. Usually quilting was done "in the ditch" which meant the stitches were hidden in the seam lines between the pieces. So the quilting pattern was just following the outline of the squares and triangles that made up the quilt pattern. Later, quilting took on its own design so that it enhanced the quilt. Quilters took great pride in precise hand stitching on their quilts.

Traditional quilt design where quilting would follow the squares and rectangles
Fancy quilting

On my landscape quilt, I use quilting to enhance the design as well. Instead of quilting by hand, I use my darning foot on my sewing machine and free-motion quilt. I will quilt around shapes to make them stand out or I will fill in an area with dense pattern to flatten it.

When I am quilting I have to consider thread colour in my top threads as well as thread colour in my bobbin. I usually use either black or white in my bobbin depending on the colour of the fabric I am using or the colour of the top thread. I will use a variety of colours in my top thread.


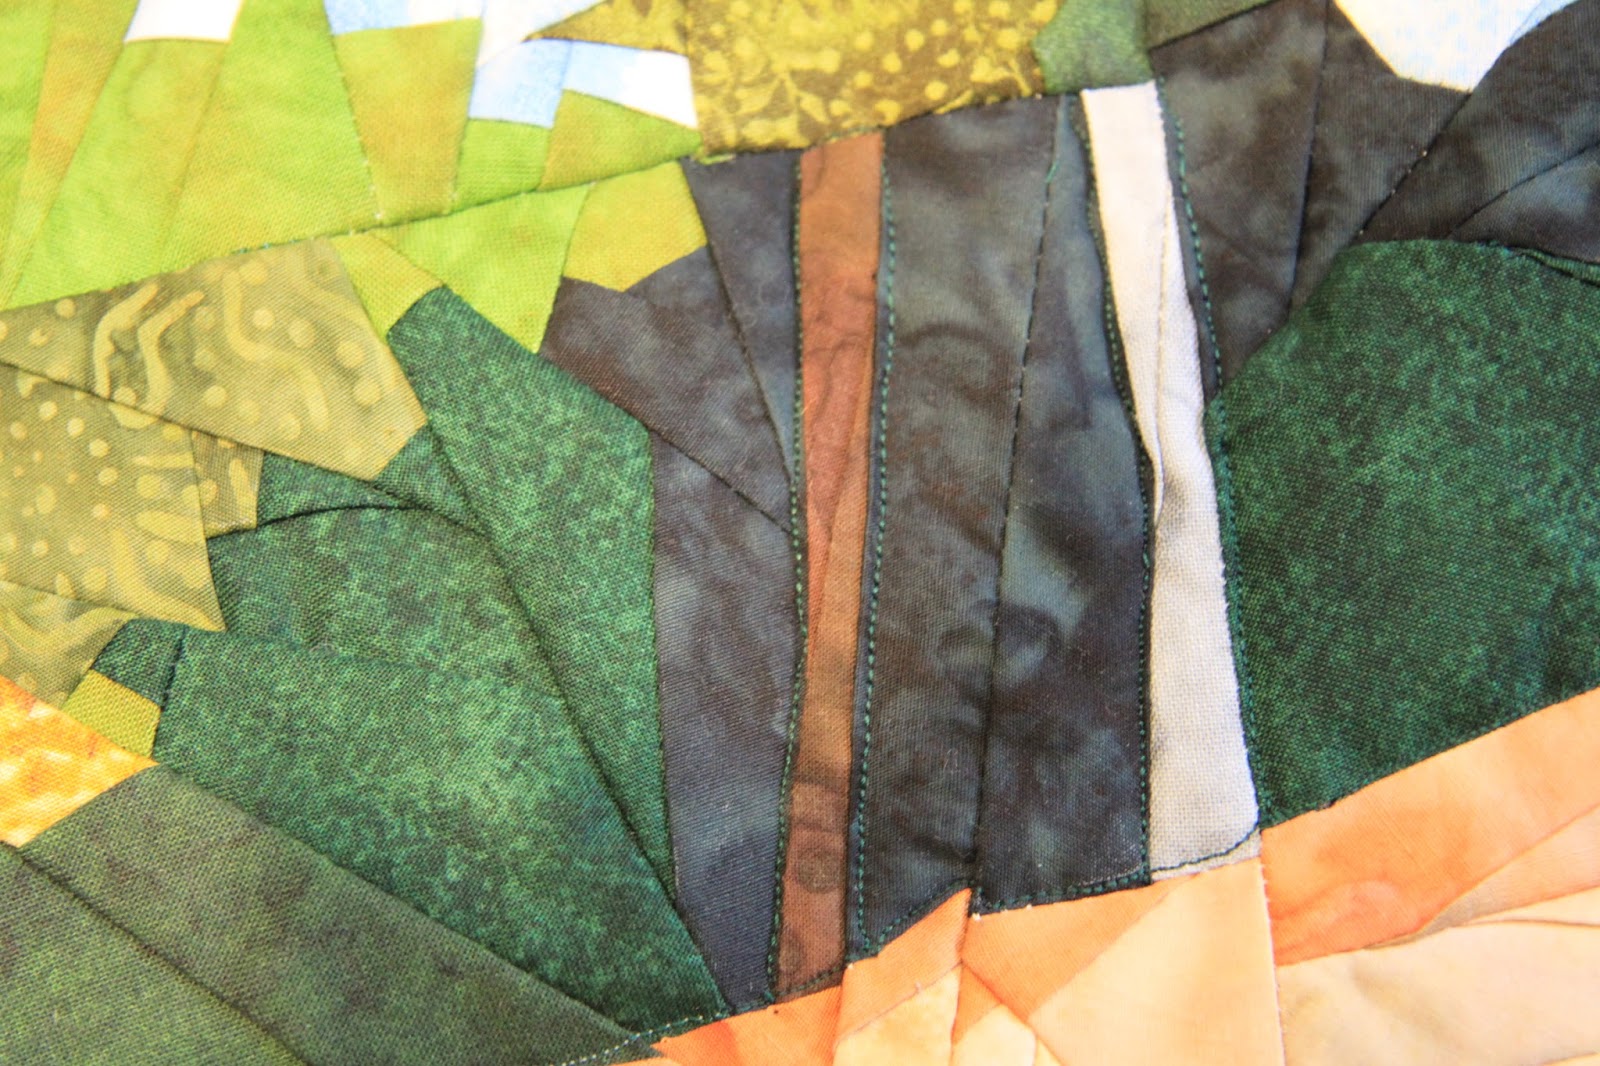
The first thing I did on the landscape quilt was "couch" a piece of yarn along the base of the rock where it meets the water's edge to define the rock from the reflection in the water. Couching is sewing a piece of yarn or piping to something using a zigzag stitch. Above you can see that it is a hairy piece of yarn that resembles moss.


The next thing was to quilt around prominent shapes such as the tree trunks so they would stand out. If you look closely you can see stitching lines on either side of the trunks.


Above I stitched around small bushes situated on the rock so they would stand out.


Then I stitched around all the trees with light blue thread in the sky area. Later I will fill in the sky with dense stitching to flatten it so it looks like the trees are closer to the viewer. I will do the same in the very dark areas under and behind the trees.


Here is the back of the quilt which shows how I quilted it so far. I used both black and white in the bobbin. The white was used in the sky and light rock areas and the black was used in the trees.

I'm very pleased with my progress so far. I can enter it into the show at any time this month before the 30th so, I'd like to move quite quickly with the quilting.

Thursday 29 October 2015

Landscape Quilt Top Completed and Recent Quilted Greeting Cards

I have been working feverishly to complete the Landscape Quilt Top and managed to do that this week. Today I attached quilt batting and a backing fabric to it and now can begin quilting. Due to the fact that I hope to enter this quilt into a show, I cannot show you the whole thing. I can, however, give you glimpses of it in detail shots. Because it is a landscape, it is better seen from a distance instead of close up which is a shame. Eventually I will post it here but for now please be satisfied with some details of the quilting process.

So because I cannot post a photo of the landscape quilt, I'm also blogging about some recent greeting cards I completed for friends and family members. I have been given old magazines from my hairdresser and also some from my sister-in-law. I go through these magazines and cut out words and phrases, interesting photos and colour combinations for use in my cards. I've also started cutting out photos of some of the models in these magazines and used them in my cards.

I'll position a photo on top of the card base and "sketch" the model with my sewing machine using free-motion stitching right overtop of the photo. Once the sewing is done, I'll remove the paper photo which leaves me with the outline that I sewed. I really like the effect it gives.

For most of these cards I used my own hand dyed or painted fabric.


On the card above I left the sunglasses and eyes to give it more interest. To make sure they didn't eventually fall off I coated that section with acrylic matt medium which dries clear.


Thursday 22 October 2015

Enjoying Fall

We are, once again, into our most colourful time of year. I often liken it to creation giving its last "hurrah" before the barren, black and white and grey of winter. Last week I took a walk to the Humber River near our home and did some sketching of the colourful trees I found there. I also have some of those cute gourds sitting on my front step and did a sketch of them. My neighbourhood sketchbook is slowly filling with interesting artwork.


 My dad is living in Holland and when I was there I was asked if I could send some Bible texts that he enjoyed that could be read to him. This week I did a small watercolour painting of the Humber River and printed Psalm 23 beside it and will send it to Holland for him.


I've also done a little more work on my landscape quilt. It is a little difficult to see but I worked on some of the water reflections. It will be easier to see when I sew all the pieces together but I think it is coming along nicely.


Thursday 15 October 2015

Landscape Quilt and a Sore Back

This past weekend was Thanksgiving Weekend in Canada and my husband and I always go on a short golf vacation. The weather was wonderful and the golf was great. We had a wonderful time together. There was one small annoyance, however, and that was that I was dealing with a sore back. In order to golf and sleep and even sit, I was slathering on the A535 cream, taking Advil and using a heat pad. By yesterday, it was much better and I am no longer taking the Advil although every once in a while I still use the A535. I had no idea what caused it and I do not often get pain like that.

Well, today, as I sat down at my sewing machine to take up again my Landscape Quilt work, I realized where the back pain came from. I have been so set on getting this quilt done that I put in as much time as I can. I have a chair on wheels that I thought was good for my back but it turns out that as I roll from my sewing machine to my ironing area as I work, I am not sitting properly and the rolling back and forth and tension in my back causes a strain in the muscles. I don't know what I am going to do about this problem because the quilt needs to get done and not only that, I love this activity. Today I worked on it for about an hour and then moved on to another activity. So far the back doesn't feel too bad.

I was able to finish the rock section of the quilt and now will have to begin the water. Remember, I haven't yet planned the water pattern or the fabric colours for it. So I think I may have to work a little more intuitively on this section. I'm a little afraid to do this, not knowing how it will turn out. But, more often than not, experimentation leads to all kinds of wonderful things. I'm banking on that!


Thursday 8 October 2015

God's Blessings to our Families

Last week I missed posting due to the fact that I was not able to spend time in my studio. I apologize to my faithful blog followers.

Now that I have some breathing room before the next deadline for my quilt, I have taken some time to work on a baby portrait that was long overdue. Babies are such a wonderful blessing from the Lord and we have quite a few of them on the way in our family.

Below are two of the most recent portraits.


Mia


Brooke


Now I have to start the next one of a baby who is already 1 month old. I'm going to get some baking started and while its in the oven, I'll begin the portrait.

Thursday 24 September 2015

Landscape Quilt - The Error that Cost me

With the deadline of September in the back of my head, I was working hurriedly on this landscape quilt to get it done in time. I was so pleased before I went to Holland that I had finished the whole upper portion. As I took the photo of it for this blog, I noticed something that didn't quite fit.


Can you spot it? On the very left section I had just finished, I noticed a tree shape that was not tree coloured. It turns out I was not careful when assigning symbols to the different fabrics and I assigned the same symbol just turned 90 degrees to two pieces of fabric. One fabric was the pink of the rocks and they other was greenish. When putting that section together, I picked up the wrong fabric, not reading the symbol correctly, thus, I now have a pink tree.


I didn't think I could get away with leaving it that way so today, I had to fix it. That meant taking apart most of that section. Because I had thrown away the pattern pieces, I had to use the pink pieces as the pattern to cut out the green pieces. "Piece of cake!", I thought. Not. Even though I took photos of the pieces as they were together, I still had issues trying to put it back together again once the new pieces were cut. I actually had to cut an extra piece of fabric to get it all to fit properly. I don't know what I did wrong. But an hour and a half later, I had the section finished for the second time.
Mistakes like this happen a lot when I am creating. Sometimes I can leave it but other times I have to try not to get frustrated, and just fix it.


Pink Tree
Green Tree

Thursday 17 September 2015

The Barn Quilt Tradition

As I am in Holland this week taking care of some business, I've posted a link to the story of Barn Quilts in the US. It is quite an interesting tradition that is growing there and I think they are really cool to look at. Perhaps it is something that will catch on here in Canada.


I hope you enjoy the article.

http://www.houzz.com/ideabooks/44992403?utm_source=Houzz&utm_campaign=u1722&utm_medium=email&utm_content=gallery4


I haven't had a lot of time for sketching but I did take some time for some little ones. Here they are.