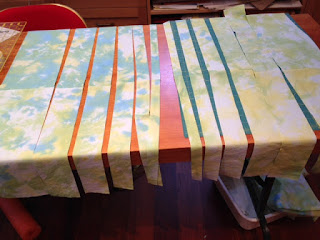
As today was another rainy day, it was perfect to finish the Convergence Quilt top. Last week you saw the fabric dying process and this week I'll show you how it was all put together.
I cut 2 13" X 13" squares from each of the two pieces of dyed fabric and then stitched 2 squares together ending up with 2 longer panels. Then, for each panel, I cut strips of different widths. 1 inch, 1.5 inches, 2 inches, 2.5 inches and 3 inches, leaving the left over strip as it ended up.
Then I mixed up the strips, taking the 1 inch strip and placing it between the last two strips of the other panel, then the 1.5 strip in between the second last and third last strips and so on until all the strips were intermingled. Then I stitched them all together.
Now, turning the completed square a 1/4 turn I cut it into strips again the same widths as above, mixed up the strips and stitched them together again.
This gives you an idea of what convergence is. My colours were not vibrant enough to make it pop but this, I thought could be made into a nice crib quilt.
I found some flannel that I had used for another crib quilt I made and used it to put a narrow border around the convergence square. Then while measuring for the wider outer border, I realized I didn't have enough fabric. So I dove into my fabric stash cupboard and found a plain piece of green that matched the fabric I had dyed and put a piece into the wider outer border.
This is the finished quilt top. This photo is truer to the colours because I photographed it with a spotlight on it. Now I just have to find a backing and place batting in between and quilt it to complete the whole quilt. I could even applique the baby's name onto the plain green fabric strip. For an experiment, I think it turned out pretty good. Now that I know how to do it, I can buy a little more expensive fabric or dye some cotton in brighter colours.


Hi Arja, this turned out really nice. I love the colours - I find it very calming and I think it makes a beautiful baby quilt.
ReplyDelete